> ## Documentation Index
> Fetch the complete documentation index at: https://smartcar.com/docs/llms.txt
> Use this file to discover all available pages before exploring further.
# Testing with Postman
> Use the Smartcar Postman collection and a simulated vehicle to make your first API requests without a real car.
Postman is an API client that lets you send requests and inspect responses without writing any code. Pair it with a [simulated vehicle](/docs/getting-started/dashboard/simulator) and you can exercise the whole Smartcar API, including commands and webhooks, before you connect a real vehicle.
By the end of this guide you will have an access token, a simulated vehicle, and a working request that returns vehicle data.
## What you'll need
* A [Postman account](https://identity.getpostman.com/signup) and the [Postman app](https://www.postman.com/downloads/)
* A [Smartcar Dashboard account](https://dashboard.smartcar.com/signup)
* An application on the v3 API. See [API Authentication Setup](/docs/getting-started/how-to/api-authentication) if you aren't sure.
## Step 1: Fork the collection and environment
Smartcar publishes both a collection and an environment in the [Smartcar API workspace](https://www.postman.com/smartcar/smartcar-api) on the Postman API Network.
Open the [Smartcar API Collection](https://www.postman.com/smartcar/smartcar-api/collection/btrmn6x/smartcar-api-collection) and select **Fork** to copy it into your own workspace.
Do the same for the **SmartcarApi Variables** environment in that workspace. It holds the base URLs plus the placeholders you fill in below.
In Postman, choose **SmartcarApi Variables** from the environment selector. Requests fail with unresolved `{{variable}}` errors if no environment is selected.
The environment defines these variables:
| Variable | Description |
| ----------------------------------------------------------- | ----------------------------------------------------- |
| `clientId` | Your application's client ID |
| `clientSecret` | A client secret you generate in the Dashboard |
| `accessToken` | Set automatically when you run **Client Credentials** |
| `vehicleId` | The vehicle you want to query |
| `userId` | The user the vehicle is connected to |
| `iamUrl`, `vehicleUrl`, `managementUrl`, `compatibilityUrl` | Smartcar base URLs, prefilled |
## Step 2: Add your API credentials
In the [Smartcar Dashboard](https://dashboard.smartcar.com), go to **Configuration > API credentials**. Copy your **Client ID**, then generate a **Client Secret**.
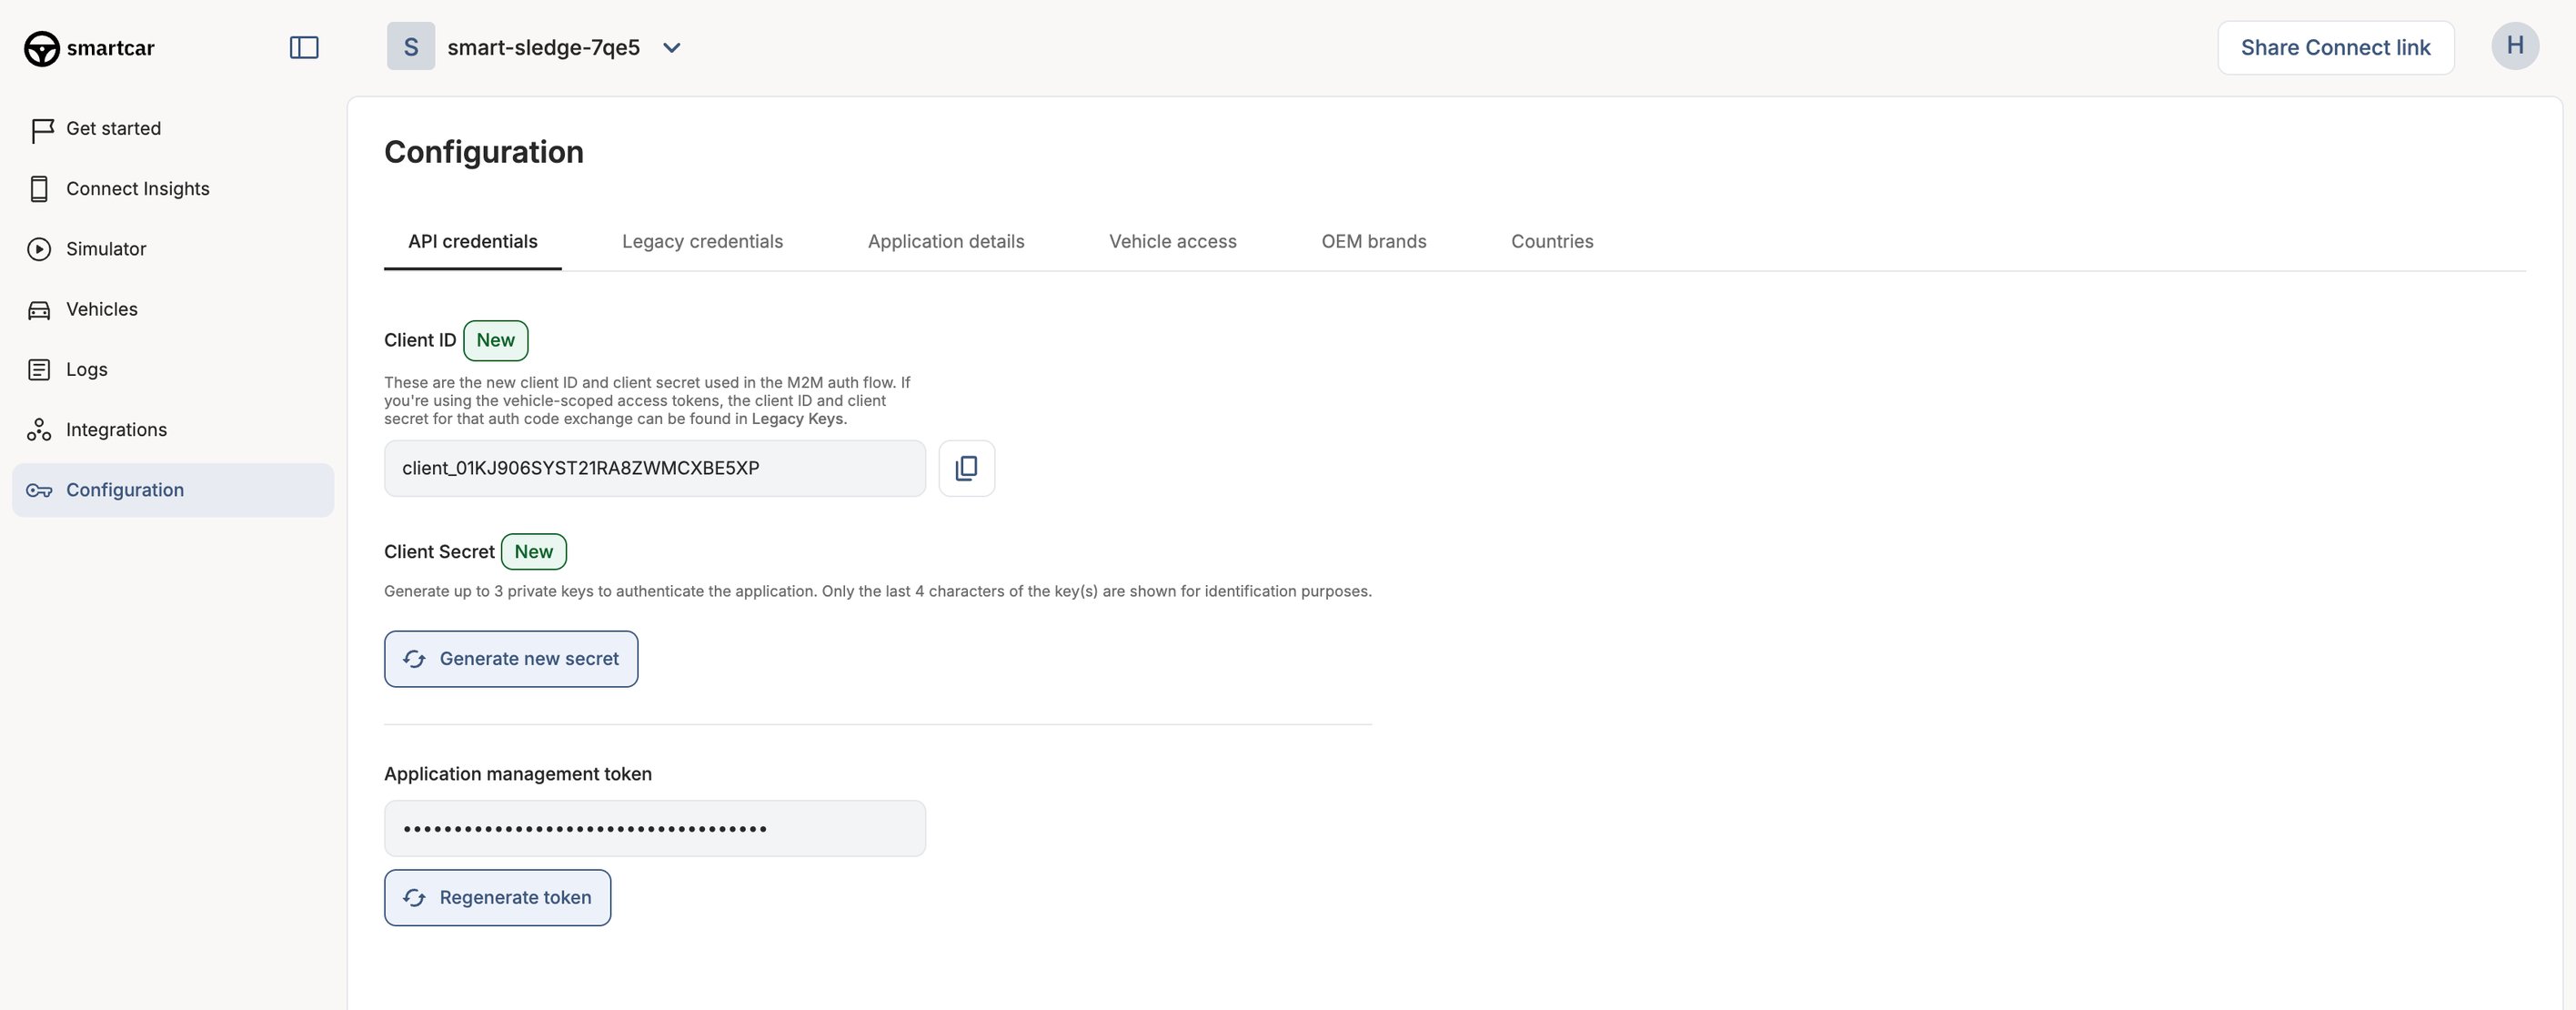 Paste both values into the `clientId` and `clientSecret` variables in your Postman environment.
The client secret is shown only once, and it grants access to every vehicle connected to your application. Store it somewhere secure and never commit it or share a Postman workspace that contains it.
## Step 3: Get an access token
Run the **Client Credentials** request. It posts your credentials to the token endpoint and returns an application-level access token:
```json theme={null}
{
"access_token": "{access_token}",
"token_type": "Bearer",
"expires_in": 3600
}
```
The request has a test script that writes `access_token` into the `accessToken` environment variable, so every other request in the collection picks it up automatically.
Access tokens are valid for **1 hour** and there is no refresh token. When requests start failing, run **Client Credentials** again. See [Request an access token](/docs/api-reference/authorization/request-access-token) for the full reference.
## Step 4: Create a simulated vehicle
In the Dashboard, open the **Simulator** tab and select **Add simulated vehicle**. Choose a powertrain type, give the vehicle a name, and leave **Automatically connect to application** enabled so the vehicle is ready to query straight away.
Paste both values into the `clientId` and `clientSecret` variables in your Postman environment.
The client secret is shown only once, and it grants access to every vehicle connected to your application. Store it somewhere secure and never commit it or share a Postman workspace that contains it.
## Step 3: Get an access token
Run the **Client Credentials** request. It posts your credentials to the token endpoint and returns an application-level access token:
```json theme={null}
{
"access_token": "{access_token}",
"token_type": "Bearer",
"expires_in": 3600
}
```
The request has a test script that writes `access_token` into the `accessToken` environment variable, so every other request in the collection picks it up automatically.
Access tokens are valid for **1 hour** and there is no refresh token. When requests start failing, run **Client Credentials** again. See [Request an access token](/docs/api-reference/authorization/request-access-token) for the full reference.
## Step 4: Create a simulated vehicle
In the Dashboard, open the **Simulator** tab and select **Add simulated vehicle**. Choose a powertrain type, give the vehicle a name, and leave **Automatically connect to application** enabled so the vehicle is ready to query straight away.
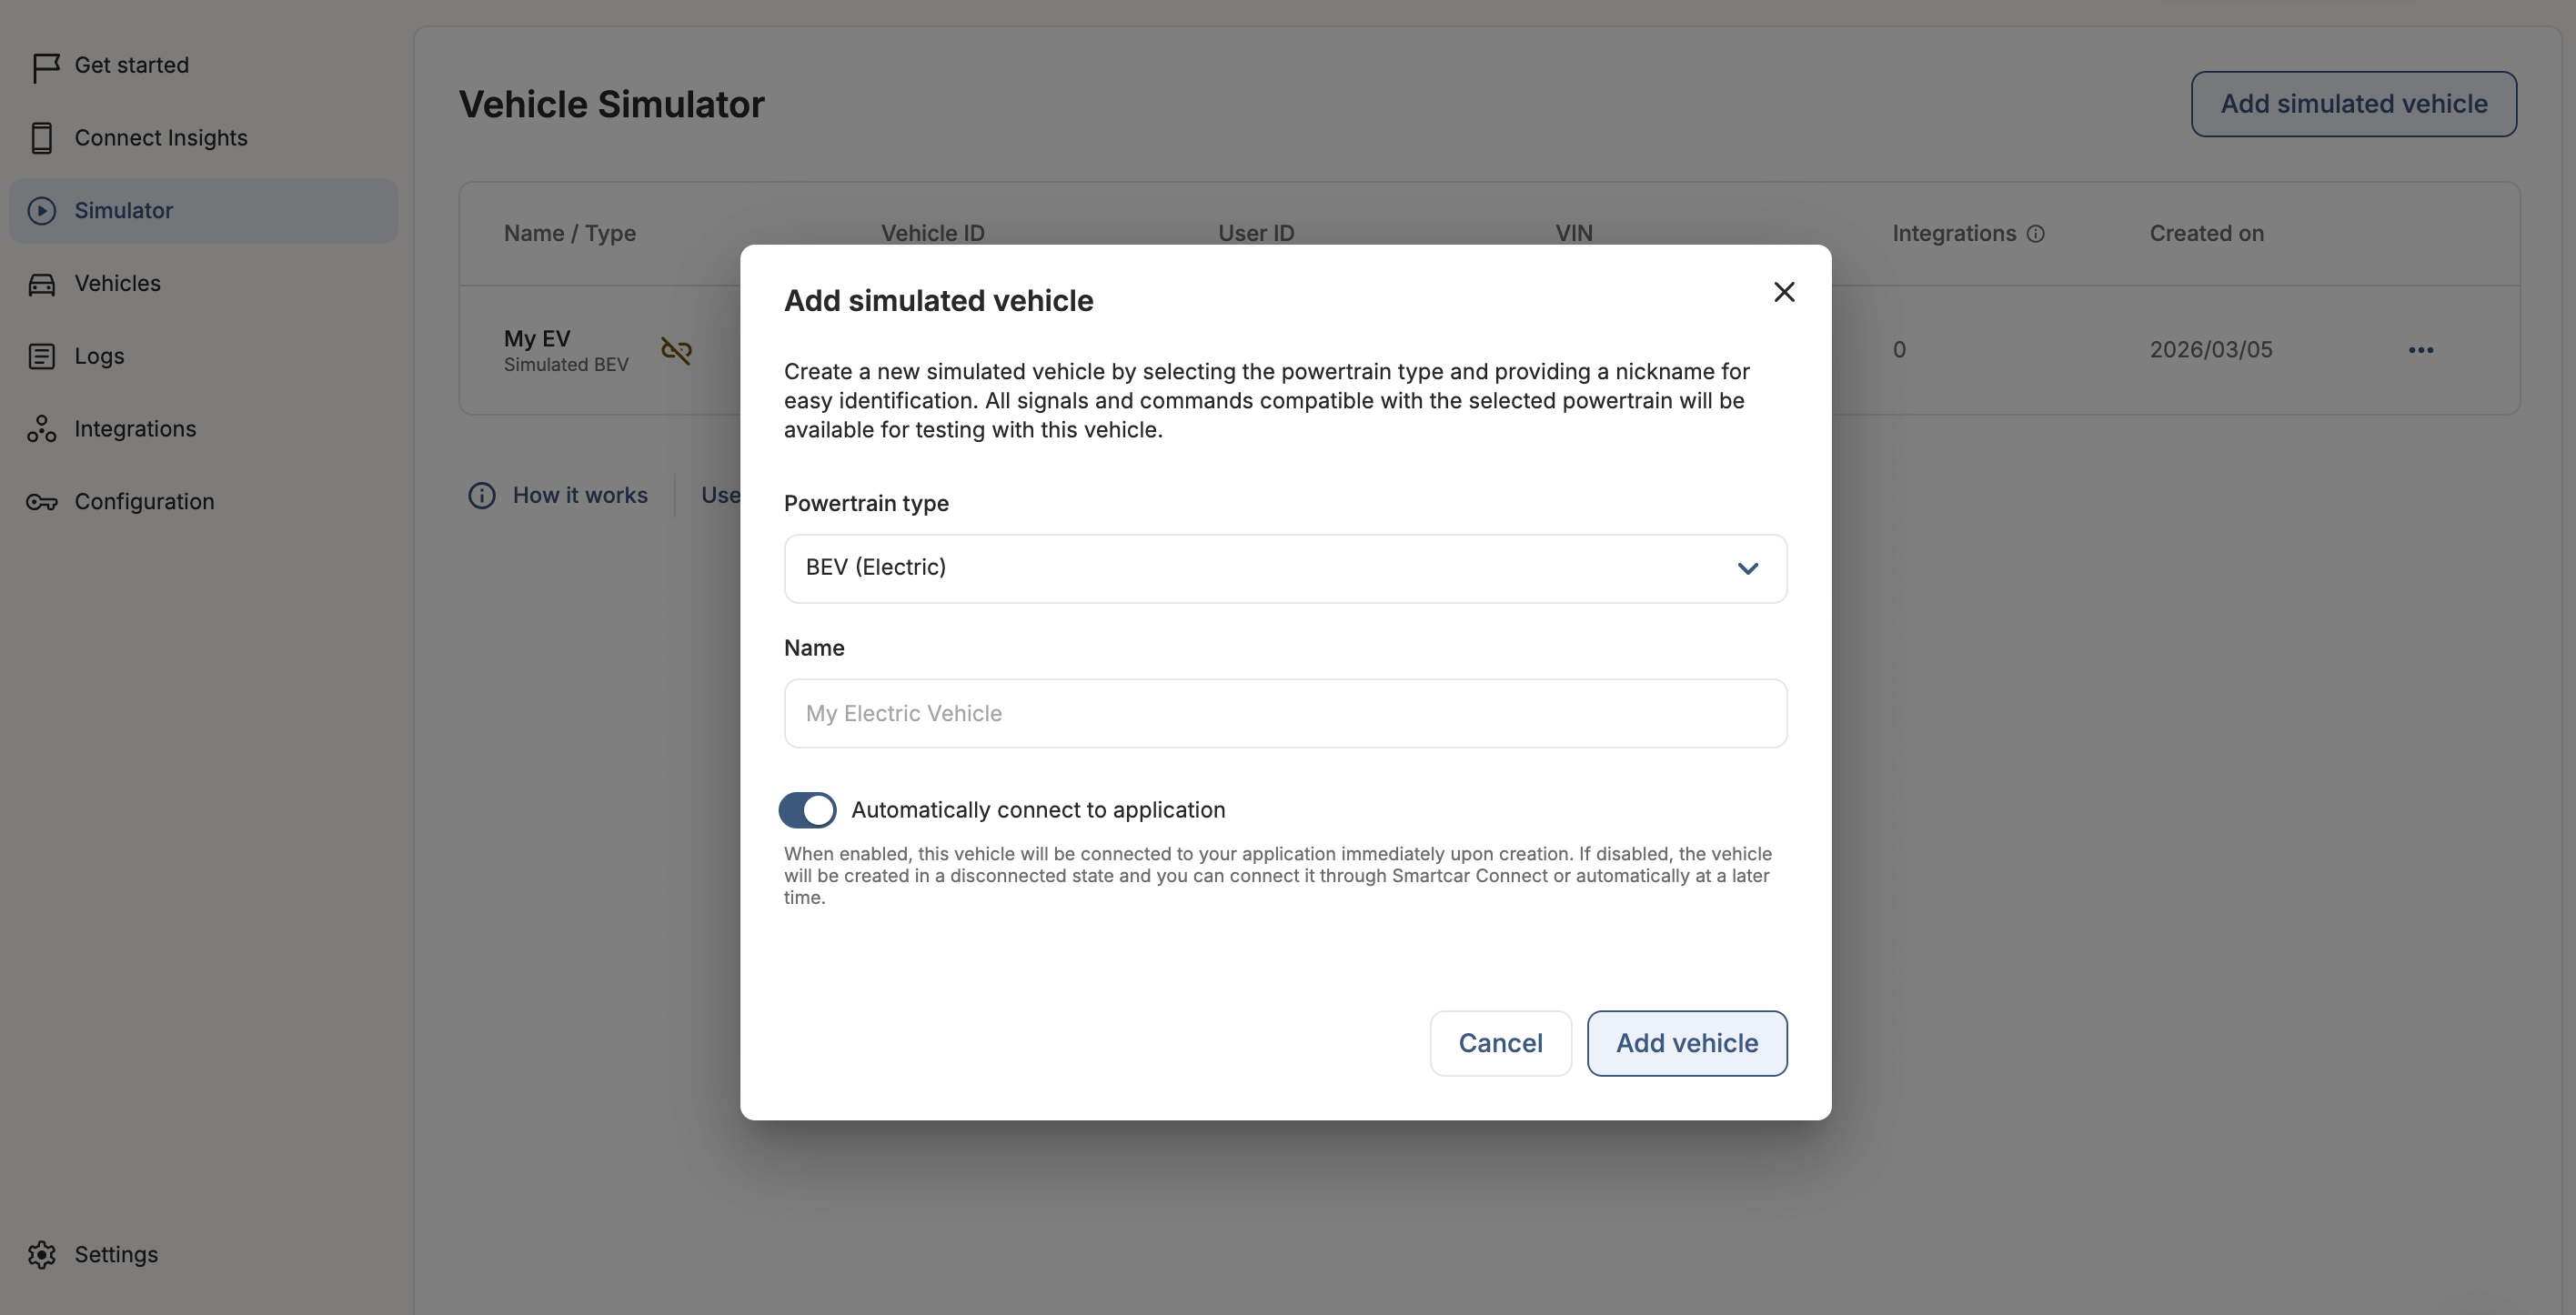 The powertrain type you pick (BEV, PHEV, HEV, or ICE) determines which signals and commands are available. Simulated vehicles are granted all compatible permissions by default.
Once the vehicle is created, copy its **Vehicle ID** and **User ID** from the Simulator table into the `vehicleId` and `userId` environment variables in Postman.
Simulated vehicles appear in your connections and logs with `Simulated` as the make and the powertrain type as the model, for example `2023 Simulated BEV`.
## Step 5: Confirm the connection
Run the **Connections** request to list the vehicles connected to your application. To see only simulated vehicles, enable the `filter[vehicle.mode]` query parameter and set it to `simulated`.
Your new vehicle should appear with the same ID you copied in the previous step. If it doesn't, the vehicle was likely created in a disconnected state, so connect it from the Simulator before continuing.
## Step 6: Read vehicle data
With `accessToken`, `vehicleId`, and `userId` all set, run:
* **Vehicle** to get the vehicle's details
* **Signals** to read every signal the vehicle exposes
* **Signal** to read one signal, for example `charge-chargetimers`
Signal requests send the user's ID in the `sc-user-id` header, which the collection populates from `{{userId}}`. A request that returns an authorization error is usually missing that variable.
## Step 7: Send a command
Simulated vehicles support these commands:
* [Lock and unlock](/docs/api-reference/control-lock-unlock)
* [Start and stop charge](/docs/api-reference/evs/control-charge)
* [Set charge limit](/docs/api-reference/evs/set-charge-limit)
* [Send destination](/docs/api-reference/send-destination-to-vehicle)
Run **Commands security/lock**, then return to the vehicle in the Simulator and select **Refresh** to see the updated state.
## Step 8: Change the vehicle state
The Simulator gives you direct control over the vehicle's data. Open the vehicle's **Vehicle state** tab, edit any signals you want, and select **Publish**. Re-run your Postman requests and the responses reflect the new state.
The powertrain type you pick (BEV, PHEV, HEV, or ICE) determines which signals and commands are available. Simulated vehicles are granted all compatible permissions by default.
Once the vehicle is created, copy its **Vehicle ID** and **User ID** from the Simulator table into the `vehicleId` and `userId` environment variables in Postman.
Simulated vehicles appear in your connections and logs with `Simulated` as the make and the powertrain type as the model, for example `2023 Simulated BEV`.
## Step 5: Confirm the connection
Run the **Connections** request to list the vehicles connected to your application. To see only simulated vehicles, enable the `filter[vehicle.mode]` query parameter and set it to `simulated`.
Your new vehicle should appear with the same ID you copied in the previous step. If it doesn't, the vehicle was likely created in a disconnected state, so connect it from the Simulator before continuing.
## Step 6: Read vehicle data
With `accessToken`, `vehicleId`, and `userId` all set, run:
* **Vehicle** to get the vehicle's details
* **Signals** to read every signal the vehicle exposes
* **Signal** to read one signal, for example `charge-chargetimers`
Signal requests send the user's ID in the `sc-user-id` header, which the collection populates from `{{userId}}`. A request that returns an authorization error is usually missing that variable.
## Step 7: Send a command
Simulated vehicles support these commands:
* [Lock and unlock](/docs/api-reference/control-lock-unlock)
* [Start and stop charge](/docs/api-reference/evs/control-charge)
* [Set charge limit](/docs/api-reference/evs/set-charge-limit)
* [Send destination](/docs/api-reference/send-destination-to-vehicle)
Run **Commands security/lock**, then return to the vehicle in the Simulator and select **Refresh** to see the updated state.
## Step 8: Change the vehicle state
The Simulator gives you direct control over the vehicle's data. Open the vehicle's **Vehicle state** tab, edit any signals you want, and select **Publish**. Re-run your Postman requests and the responses reflect the new state.
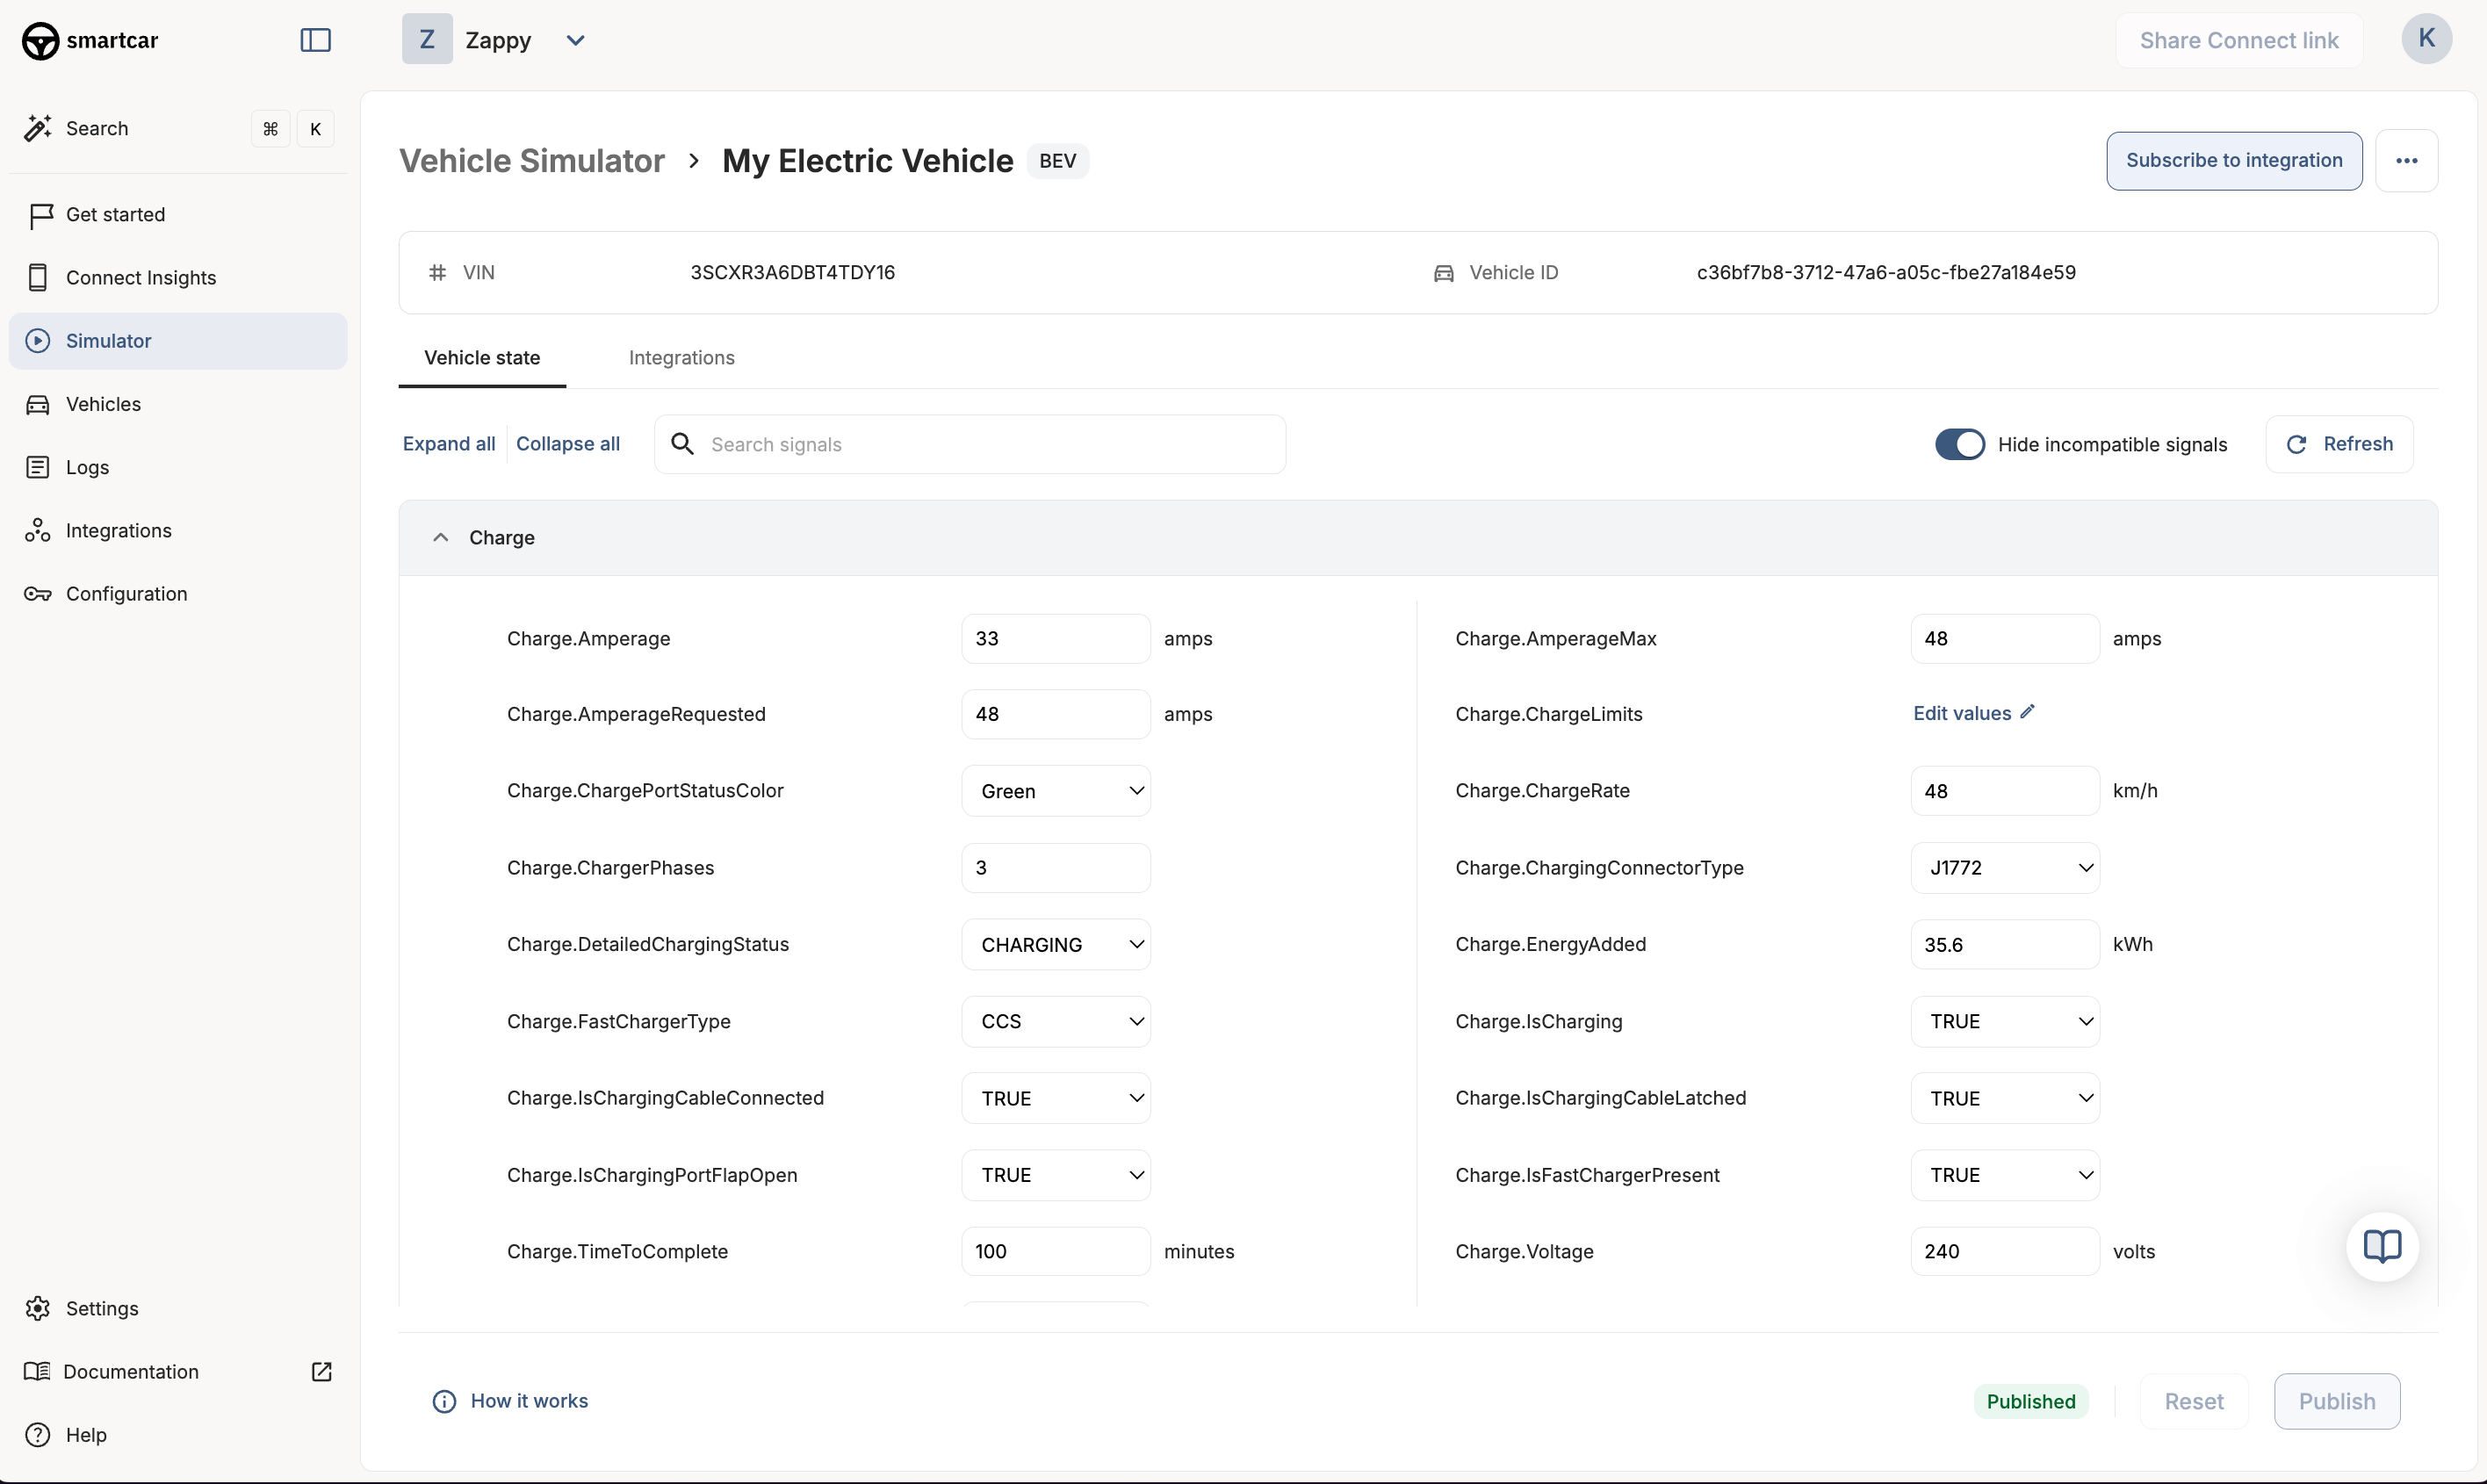 This is also how you reproduce errors. For example, set `Transmission.GearState` to `DRIVE` and a lock command returns a `VEHICLE_STATE:IN_MOTION` error, or uncheck a permission under `VehicleUserAccount.Permissions` and the matching request returns a permission error.
Simulated vehicles have no rate limits and no command latency, so responses come back immediately. Live vehicles behave differently on both counts.
## Testing Smartcar Connect in simulated mode
The steps above use application-level tokens, which is the recommended way to reach both live and simulated vehicles. If your integration uses the OAuth 2.0 authorization code flow instead, you can rehearse the vehicle owner's experience against a simulated vehicle.
Turn off **Automatically connect to application** when creating the simulated vehicle, or disconnect an existing one.
Select **Connect manually via Smartcar Connect** to get a Connect URL with `mode=simulated` and the credentials to sign in with.
Launch the URL, pick any brand, and sign in with the generated credentials.
This is also how you reproduce errors. For example, set `Transmission.GearState` to `DRIVE` and a lock command returns a `VEHICLE_STATE:IN_MOTION` error, or uncheck a permission under `VehicleUserAccount.Permissions` and the matching request returns a permission error.
Simulated vehicles have no rate limits and no command latency, so responses come back immediately. Live vehicles behave differently on both counts.
## Testing Smartcar Connect in simulated mode
The steps above use application-level tokens, which is the recommended way to reach both live and simulated vehicles. If your integration uses the OAuth 2.0 authorization code flow instead, you can rehearse the vehicle owner's experience against a simulated vehicle.
Turn off **Automatically connect to application** when creating the simulated vehicle, or disconnect an existing one.
Select **Connect manually via Smartcar Connect** to get a Connect URL with `mode=simulated` and the credentials to sign in with.
Launch the URL, pick any brand, and sign in with the generated credentials.
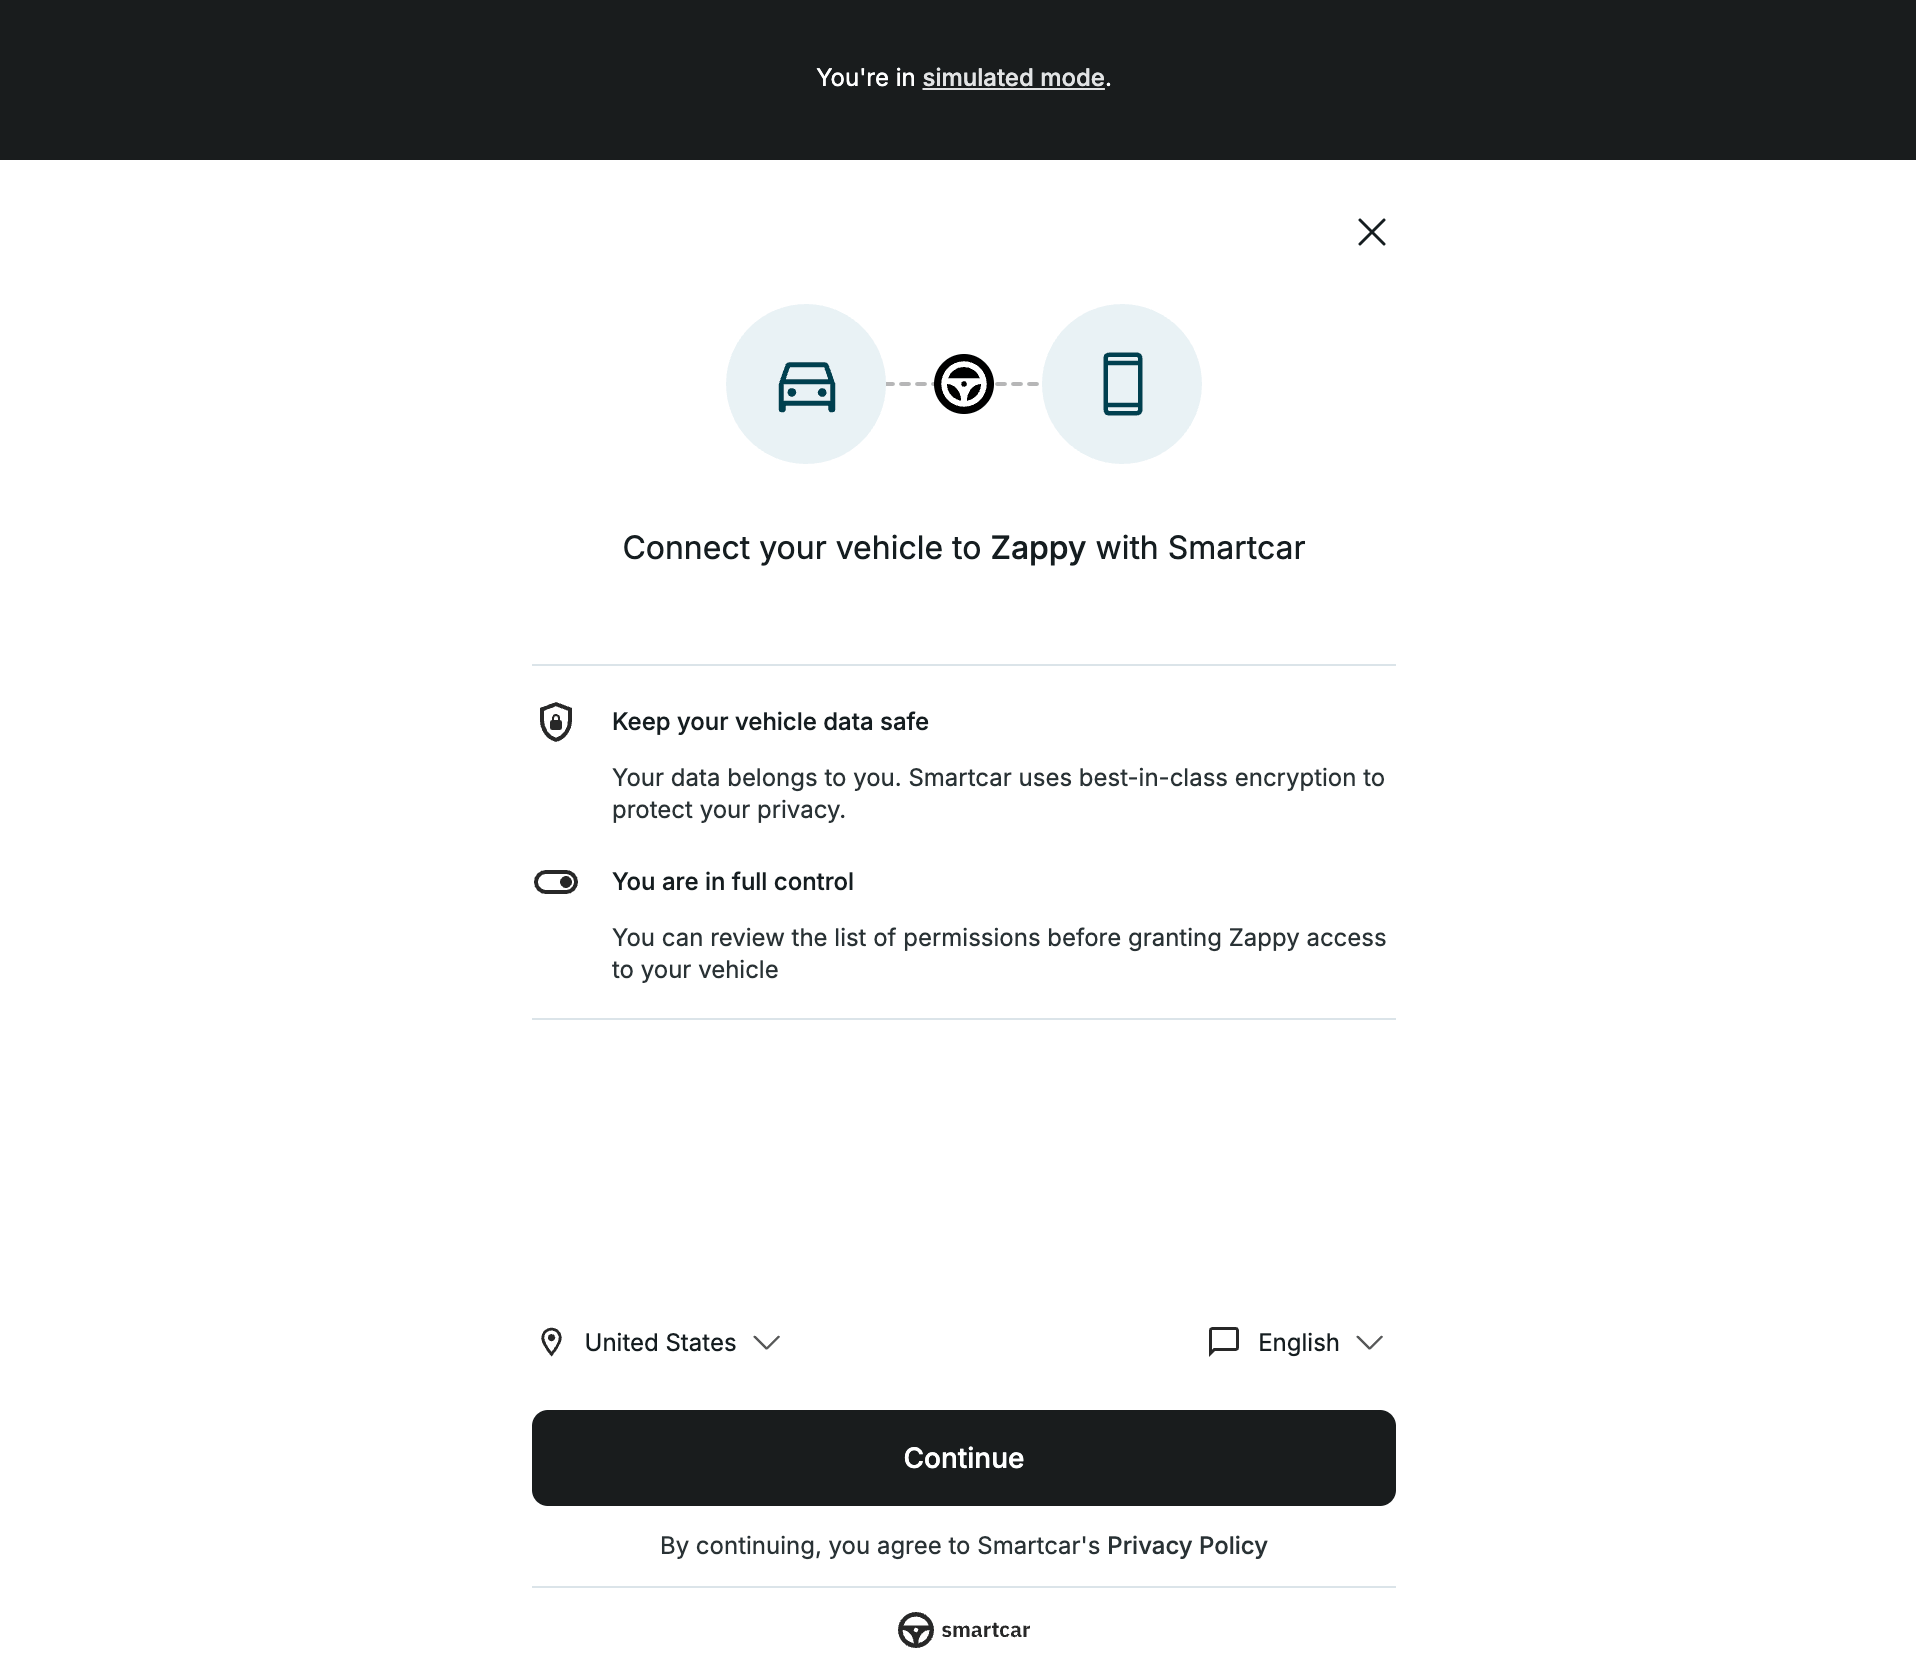 The simulated Connect flow uses `response_type=none`, so it does not return a per-vehicle access token. To receive an authorization code you can exchange, launch Connect with `response_type=code` and a configured redirect URI.
## Troubleshooting
Select the **SmartcarApi Variables** environment in Postman. Without it, `{{clientId}}` and the other placeholders are never substituted.
Access tokens expire after 1 hour and there is no refresh token. Run **Client Credentials** again to mint a new one.
Check that the permission is still granted. Simulated vehicles grant all compatible permissions by default, but they can be toggled off under the `VehicleUserAccount.Permissions` signal. See [Permissions](/docs/api-reference/permissions).
Also confirm the signal or command is supported by the powertrain type you chose.
The vehicle was probably created with **Automatically connect to application** turned off, or it was disconnected later. Connect it from the Simulator, then run **Connections** again.
## What's next
Subscribe a simulated vehicle to an integration and trigger deliveries by publishing state changes.
See every signal you can read and configure.
Download the raw OpenAPI documents to generate code or feed the schema into your own tooling.
The simulated Connect flow uses `response_type=none`, so it does not return a per-vehicle access token. To receive an authorization code you can exchange, launch Connect with `response_type=code` and a configured redirect URI.
## Troubleshooting
Select the **SmartcarApi Variables** environment in Postman. Without it, `{{clientId}}` and the other placeholders are never substituted.
Access tokens expire after 1 hour and there is no refresh token. Run **Client Credentials** again to mint a new one.
Check that the permission is still granted. Simulated vehicles grant all compatible permissions by default, but they can be toggled off under the `VehicleUserAccount.Permissions` signal. See [Permissions](/docs/api-reference/permissions).
Also confirm the signal or command is supported by the powertrain type you chose.
The vehicle was probably created with **Automatically connect to application** turned off, or it was disconnected later. Connect it from the Simulator, then run **Connections** again.
## What's next
Subscribe a simulated vehicle to an integration and trigger deliveries by publishing state changes.
See every signal you can read and configure.
Download the raw OpenAPI documents to generate code or feed the schema into your own tooling.